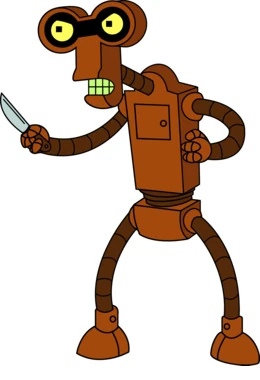
Welp, back at it again with another Futurama post! I have mentioned in previous posts that Futurama is my favorite show. Roberto is one of my favorite side characters and "Insane in the Mainframe" is one of my favorite episodes too. I love the funny one liners and the fact that he robs the same bank three times. I had the idea to make Roberto for a while and had a pretty clear vision of how I would make him. A lot of blood, sweat and tears went into this (literally, cut my hand open and had to get two stitches.) He made his appearance at Denver Pop Culture Con 2019 and was surprisingly a big hit! I wasn't sure of how he would be received since he is primarily in one episode that aired almost 20 years ago but I had never been stopped so much for pictures and sometimes would have swarms of people around me. Anyway, this is a rough idea of how I made him. I tried to take as many progress photos as possible.
It all started with cardboard! I found a big piece of cardboard in the local recycling bin and since I work in grocery stores I was able to find a couple of cardboard boxes that I would use for the body. I decided to just start making him and adjusted things as I went on.

I cut out a rough shape for his face and started to build off of there. I took long strips of cardboard and hot glued them around the face shape. Cut out where the mouth piece would go. I realized that I didn't bend the front part out enough and had to adjust from there.

I glued the bottom piece on to wrap around the front for the chin detail. I had to fill in where the front bendy piece meets the mouth and the bottom chin part meets the mouth with small pieces of cardboard since I didn't originally account for those pieces. I used the same plastic canvas that I used for Leela's eye for his mouth so that I could see out of it.


The thing I struggled with the most for the head was trying to keep it stable on my head. I found just putting my hair into a ponytail and the back piece I built into the body helped keep it on. It gets a little uncomfortable after a full day of wearing it but it is not that bad. Once I got the head where I wanted it and after a lot of adjusting I glued the whole thing to another big piece of cardboard and cut out around the head to close off the back. I cut out where I wanted the eyes to be so that I could start paper mache-ing it. (I also paper mached the body at this point too) I think the paper mache was my favorite part. I used the flour/water method but I think in the future I will use wood glue because the flour does chip off chunks once it is dry.

Once the paper mache was dry I primed the head with a few layers of gesso. I pulled the plastic canvas piece out too so I didn't get paint on it.

Finding the perfect color for Roberto ended up being a lot more difficult than I thought. In my mind I always thought he was a reddish color but he is more of a burnt orange color. I found the perfect color for him at Michael's and bought 4 tubes of it to make sure I had enough. I think it took 3-4 coats of paint to get a nice even coating.

Once he was painted I added the plastic canvas back in. I used felt to add the mouth detail and hot glued it on. I used black poster board for his eyes. I cut out holes so that I could add lights. The poster board ended up being a little more difficult to get in place but I just hot glued it in and hoped for the best. I used yellow construction paper to cover the holes that I cut in the poster board. I cut out circles and cut off a piece so he looks more menacing. I cut out black squares for his pupils and glued them on to the yellow eyes and glued the eyes to the poster board.

That was basically how I made the head. That was the most difficult part of the costume.
For the body I used one big cardboard box and cut out arm holes and a head hole. I cut out the front part a little bit so it looks like my head is sticking out of it since I do not have the same proportions of a robot. I added a half dome shape to the back of the box to match Roberto's. This also helped keep the head stable. For the bottom piece I just used a smaller box that fit over my hips and cut a hole out on the top. I paper mached it. My partner helped me out a lot and primed and painted it for me since I was running out of time.


For the base layer I found a long sleeve shirt and leggings that were similar in color. I painted black lines on them to match Roberto.

I wore black gloves since I ran out of time to make anything else. I made feet for him too out of plastic bowls but they fell apart almost immediately at the con. The plastic knife was a lucky dollar store find. The money bag was a pillow case from the dollar tree that I rounded off with the sewing machine. I drew the money sign on it with sharpie and stuffed it with newspaper to make it look full of money. I added tap lights for his eyes and just taped them in at the con. 😂

I spent a solid two months working on this every day after work and on my days off. It is my biggest and most ambitious cosplay I have made and honestly I am pretty proud of it especially since I was working two jobs at the time! I was so surprised by the response and had a lot of fun wearing him.


I wore him at Colorado Springs Comic Con as well with my partner as Fry. We happened to run into another Fry! haha.
 |
| Hey Red! |
I hope this helps in your quest in making your own Roberto cosplay or maybe helps give you some ideas on how to make another cosplay!
Follow me on instagram for more up to date posts and things I am making @cherelledx.
More Futurama posts!


.JPG)
